Download the sample files
Download HawsBlogMenu.zip and extract it to somewhere outside the AutoCAD Support Files Search Path. Copy the files one by one as desired for testing to your application's install folder or another test folder in the AutoCAD Support Files Search Path.
Load your custom menu
Load your custom menu as a part of the menu system (partial menu) using CUILOAD. If you don't have a custom menu, copy HawsBlog.cuix.Enter resource ID instead of filename in CUI
The only way to have two sets of images, one for Dark theme and other for Light theme, is to specify a resource ID instead of an image filename in the Custom User Interface dialog (CUI command).

You can specify resource ID by entering one you know or choosing an image from the Button Image section above the Properties section. You can use one of the icons from Autodesk or create your own.

If you need to find or create a resource ID for your image, go to the next step.
Have two custom DLL files for your CUIX file
You make a custom resource ID that works with both Dark and Light themes by specifying the same ID for contrasting images respectively inside a twin pair of custom DLL files that accompany your menu. Images inside your custom DLL appear automatically in the Button Image section for you to select. Or usually you enter their ID since the list is long.
Your first twin custom DLL has the same location and base name as your CUIX, and it provides images that work with the Dark theme (in other words, they have light graphics). You also have a second twin custom DLL that provides dark images to work with the Light theme. It has the same name as the first, but with _light appended. These are the three files:
- hawsblog.cuix
- hawsblog.dll (Dark theme, light images)
- hawsblog_light.dll (Light theme, dark images)
Unload your menu using CUILOAD, copy in your twin DLL files, delete your two twin custom MNR files, and reload your menu using CUILOAD. Then your custom images appear in the Button Image section or can be used by entering their resource ID.
If you don't have custom DLL files for your CUIX file or if you want to find or add a resource ID inside your DLL files, go to the next step.
Make a custom DLL file
Method 1: Point and click modify (Easier to try)
Copy a DLL file you know works. Rename it for your CUIX file and test the steps above to use one of its resource IDs in your own CUIX. If you don't know any resource IDs for your DLL, see the next paragraph.
Method 2: Text file create (Easier to manage)
- Modify HawsBlog.rc text file (using Notepad or your favorite text editor) to point to your ICO (can have multiple sizes) or PNG file(s). It is very simple and has nothing but one line per resource ID.

- Install Microsoft Visual Studio (currently free of charge).
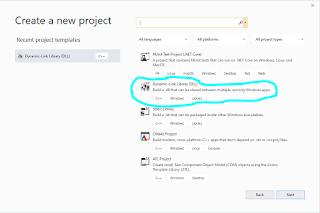
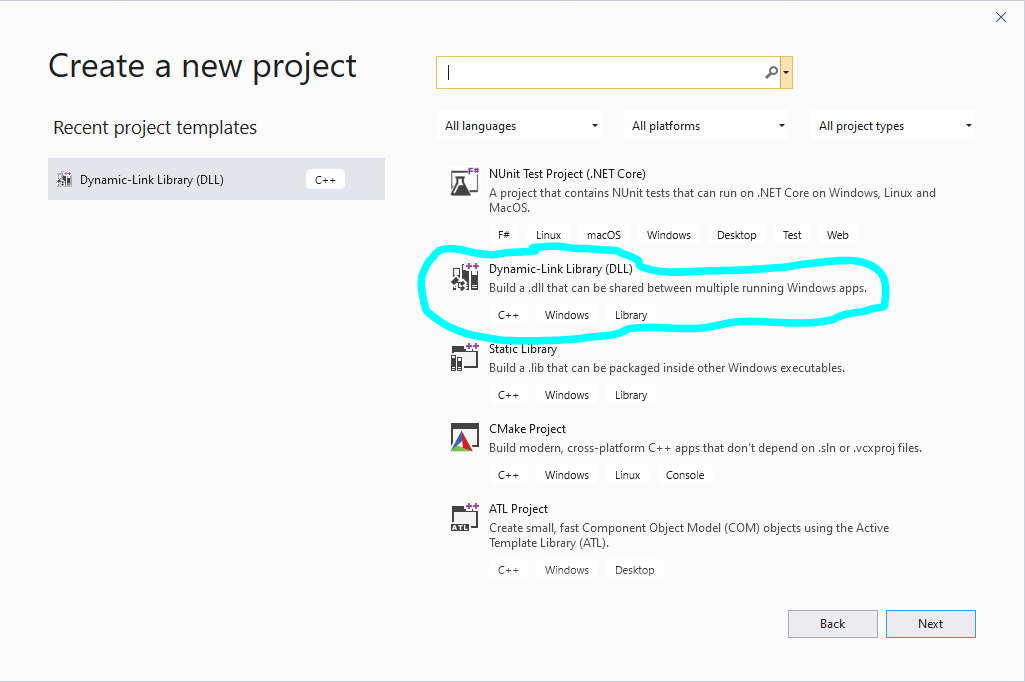
- New project
- Look for a DLL project template or wizard and use it
- Put your project somewhere you like. Your DLL will end up there.
- Solution Explorer, Resource Files, Add Existing Item.... to add your RC (HawsBlog.rc) file.
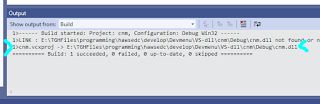
- Build, Build Solution
- Output should report where your DLL is created.
- Look inside your new DLL using File, Open, File to make sure your resource ID is inside it (you will just see your entry with binary code, not an image, just like in the screenshot under Method 1)

If you don't have an ICO or PNG file, go to the next step.
Create an ICO file
Use Gconvert to convert or batch convert your PNG or BMP file(s) to an ICO file(s). Or export from GIMP as ICO files. It's common to put all the sizes (each from a layer of a GIMP project) of a single icon into a single ICO file with a single resource ID in your RC, DLL, and CUIX files.
Using ICO files lets you control the scaling of your images at all sizes. But you can instead just use a PNG image at the largest resolution you want to support and cross your fingers for acceptable results of AutoCAD's (or any other program's) automatic image scaling.
Using ICO files lets you control the scaling of your images at all sizes. But you can instead just use a PNG image at the largest resolution you want to support and cross your fingers for acceptable results of AutoCAD's (or any other program's) automatic image scaling.
If you don't have appropriate PNG files, go to the next step.
Create a PNG image
Install GIMP. Create a new image or paste your image. Make visible the layers you want to export. Use File Export As... to export a PNG (I'm not sure about the settings you need; you probably don't need resolution, creation time, Exif, XMP, and IPTC). (This is what I did with my CNM app for now, using the same old 16x16 images I've had for years. GIMP made it easy to put all my images in one GIMP file—each as a layer—, copy each one to a new _light version layer, reverse all the black to white in the dark layers, then export each one to a PNG.)

And finally a conscientious plea: Go hug and thank a family member and then move your money from a bank to a credit union.
6 comments:
Congratulations for the tutorial, it took a bit of work but it worked perfectly.
It was necessary to learn how to create the ICO with various sizes, but I managed to do it through this link...
https://www.youtube.com/watch?v=fkuZqJCFaog
Thank you so much
Thanks! great little blog
question...do I need to keep the .dll files with the menu or does it put that information in the .mnr file?
I copied the .cuix and .mnr files to another set-up and it didn't show the icons, but did when I added the .dll files there.
Terry
Yeah. The .dll files are your icon libraries. You need them.
Works great! However I cannot get this to work with palette buttons.
Works great! Thank you for this. However, I have not been able to get this working for palette buttons. No problem referencing an out of the box resource dll for palette buttons, but when I create a custom one, the palette button does not seem to read it.
I have only tested toolbars and ribbon. I haven't tested palette buttons.
Post a Comment